








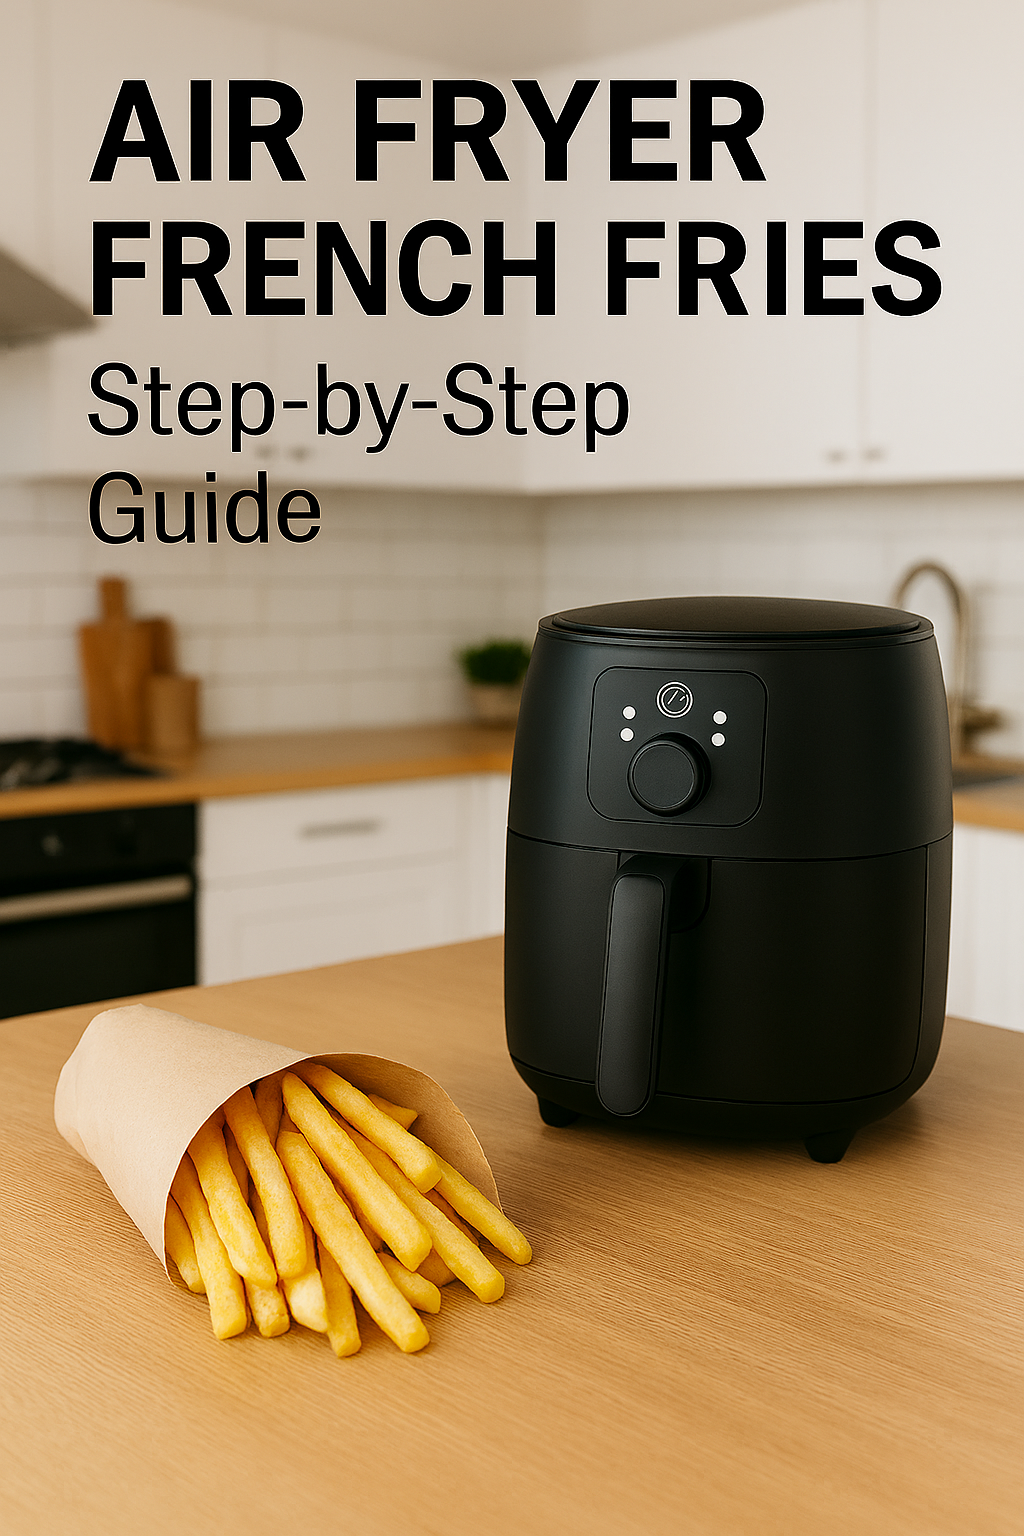
Crispy & Golden Air Fryer French Fries —The Recipe That Will Change How You Think About Cooking

By DISPASAL | Your Trusted Home Appliance Partner
There is a moment — and if you own an air fryer, you know exactly what this moment feels like — when you open the basket after twenty minutes, and the smell hits you first. Hot, golden, slightly seasoned, unmistakably potato. Then you look down and see them: perfectly browned, lightly crisp on the outside, with that satisfying colour that tells you before you even taste one that something went very right in that kitchen today.
That is the air fryer french fry moment. And once you experience it, the thought of pouring a litre of boiling groundnut oil into a pot just to make chips begins to feel unnecessary, messy, and honestly a little excessive.
This article is two things at once. It is a complete, detailed recipe for the crispiest, most golden french fries you can make at home — with every tip and technique that separates a truly excellent fry from a disappointing, soggy one. And it is also an honest exploration of what the air fryer is actually capable of, because french fries are just the beginning of what this appliance does, and understanding its full range is the difference between owning one that sits on your counter collecting dust and owning one that becomes the most-used appliance in your kitchen.
Whether you already have an air fryer or you are reading this wondering if you should get one — by the time you finish, you will know exactly what this machine can do. And you will probably be craving chips.
First — Why the Air Fryer Makes the Best French Fries
Before we talk about the recipe, let us talk about the science, because understanding why the air fryer works so well for fries makes every step of the recipe make sense.
The 360° Hot Air Principle
An air fryer is not a fryer in the traditional sense. It does not submerge food in oil. What it actually does is generate intensely hot air and circulate it around your food at very high speed from every direction simultaneously — above, below, and all sides at once. This 360-degree circulation of superheated air is what creates the same golden, crispy exterior that you associate with deep frying.
When a french fry sits in an air fryer basket, every surface of that fry is being hit by hot moving air continuously. The moisture on the surface evaporates rapidly. The outside of the potato dehydrates and crisps. The starch on the surface gets a light, dry, golden crust. Meanwhile, the heat penetrating inward cooks the potato through to a soft, fluffy interior.
The result is a fry that is genuinely crispy on the outside and tender on the inside — achieved with a tablespoon of oil rather than a pot full of it.
The Oil Advantage
A traditional deep fryer for making chips uses between 1 and 2 litres of oil per session. The potato absorbs a significant portion of that oil during cooking — which is exactly why deep-fried chips taste so indulgent, but also why they sit heavy, leave grease on your fingers, and carry far more fat and calories than any nutritionist would recommend for regular consumption.
An air fryer french fry uses approximately one to two tablespoons of oil for an entire batch — enough to lightly coat each fry so the surface crisps properly, but not nearly enough to be absorbed into the flesh. The fry stays light. The taste stays real. The crunch stays satisfying. And the guilt largely disappears.
For families making chips two or three times a week, the reduction in cooking oil consumption alone saves meaningful money over the course of a month. In Nigeria’s current economy, that is a benefit worth taking seriously.
What Else Can an Air Fryer Do? (Before We Make the Chips)
Many people buy an air fryer for chips and discover, somewhat accidentally, that they have purchased one of the most versatile cooking appliances available. Here is a genuine picture of what a quality air fryer handles with ease:
Fried chicken and chicken wings — arguably the air fryer’s most celebrated result. Crispy, golden skin with moist, fully cooked meat. No oil splatter. No watching the pot. No burns.
Fish — fresh tilapia, catfish, or mackerel with crispy skin and flaky, tender flesh. Ready in 12 to 15 minutes without the smell of hot oil filling the entire house.
Plantain (dodo) — this is the one that surprises most Nigerian households. Air-fried plantain comes out beautifully caramelised on the outside, sweet and soft inside, with a fraction of the oil used in pan-frying. Many people report it tastes better.
Spring rolls and samosas — crispy, golden, and light. Without the deep frying, the pastry gets that satisfying crunch without the oiliness.
Suya and kebabs — the high, consistent heat of an air fryer is excellent for grilling-style cooking. Season your meat, skewer it or lay it flat, and the result is beautifully charred edges with juicy interior.
Sausages and hotdogs — ready in 8 minutes with a perfect, slightly blistered exterior.
Bacon — flat, evenly cooked, exactly as crispy as you want it, without the pan splatter.
Eggs — baked eggs, frittata-style eggs in a small oven-safe dish, or even hard-boiled eggs cooked in the shell without boiling water.
Reheating food — this is the air fryer function that earns daily loyalty. Leftover fried chicken, chips from yesterday, a piece of meat that has been sitting in the fridge — reheated in an air fryer comes out warm and crispy, never soggy the way microwave-reheated food can be.
Baking — on convection-capable models, you can bake small cakes, muffins, chin chin, and pastries directly in the air fryer basket using an appropriate oven-safe dish.
The common thread through everything above: fast, even heat, minimal oil, no open flame, easy cleanup. That is what makes the air fryer genuinely transformative for a Nigerian kitchen, not just for chips.
The Recipe: Crispy & Golden Air Fryer French Fries
Now — the chips.
This recipe is built on technique, not just ingredients. Every step has a reason, and understanding the reason helps you adapt when you are working with what you have. No step is complicated. But every step matters.
What You Need
The potatoes: Irish potatoes (also called white potatoes or English potatoes) — these are the ideal choice for french fries. Their high starch content is what produces that fluffy, soft interior that contrasts beautifully with a crispy exterior. The older and more starchy the potato, the better the fry. You can also use Yukon Gold potatoes for a slightly creamier, buttery result.
Avoid sweet potatoes for this specific recipe — they behave differently and will be covered in a separate recipe.
Quantity: 3 to 4 medium-sized Irish potatoes serves 2 to 3 people comfortably.
The oil: Any good cooking oil with a high smoke point works well — vegetable oil, groundnut oil, canola oil, or olive oil. You need far less than you think: 1 to 2 tablespoons maximum for the whole batch. The oil’s job is to coat each fry lightly so the surface crisps properly. Too much oil and the fries turn soggy. Too little and they dry out without browning.
The seasoning: At minimum: sea salt or regular table salt. For a fuller flavour: salt, ground black pepper, garlic powder, and a pinch of smoked paprika. This combination gives you a fry that tastes complete and seasoned without being overwhelming. Other options are explored in the variations section below.
Optional but recommended: A small amount of cornstarch — about a tablespoon. This is the professional chef’s secret for extra crispiness. Cornstarch forms a light, dry coating on the fry surface that crisps up dramatically in the heat. It is not essential, but it takes your fries from good to excellent.
The Method — Step by Step
Step 1: Cut your potatoes correctly
Wash the potatoes thoroughly. Peeling is optional — the skin, if left on, adds a pleasant texture and slightly more flavour. If peeling, use a good peeler and work cleanly.
Cut each potato into even strips approximately 6 to 7mm thick — roughly the width of a pencil. Uniform thickness is important: if some strips are twice as thick as others, the thin ones will be charred by the time the thick ones are properly cooked through.
A sharp knife and a steady hand work perfectly well. If you have a mandoline, use it for absolute consistency. Aim for classic fry shapes — long, straight, even.
Step 2: The cold water soak — do not skip this
Place all your cut fries into a large bowl and cover completely with cold water. Let them soak for a minimum of 30 minutes. If you have time, soak for a full hour, changing the water once halfway through.
This step removes excess surface starch from the potato. Starch on the surface of a fry, when exposed to heat, can turn gummy rather than crispy. Removing it through soaking allows the surface to dry and crisp properly. This is the single most important step that separates genuinely crispy home fries from soft, limp disappointments. Do not rush it.
You will see the water turn cloudy and slightly milky as the starch releases — that is exactly what you want to see. It means the step is working.
Step 3: Dry them completely — this step is critical
After soaking, drain the water and spread the fries across a clean kitchen towel or several sheets of paper towel. Pat them dry thoroughly. Then let them sit for 5 minutes to air-dry further.
Any remaining moisture on the surface of the fry will turn to steam inside the air fryer. Steam is the enemy of crispiness — it softens the outer layer rather than drying and crisping it. Every drop of surface moisture you remove before cooking is another layer of crunch in the final result. Be thorough here.
Step 4: Season and coat
Transfer the dry fries to a clean, dry bowl. Drizzle 1 to 2 tablespoons of oil over them and toss well with your hands or a spoon until every fry has a light, even oil coating.
Now add your seasoning: salt, black pepper, garlic powder, and paprika. Toss again. If you are using cornstarch, sprinkle it over the fries now and toss one final time until you see a very light, uniform coating on the fries. They should look lightly dusted, not clumped.
Take a moment to make sure every fry is coated — the fries at the bottom of the bowl tend to get all the seasoning while the ones on top stay plain. Thorough tossing means every bite tastes equally good.
Step 5: Preheat the air fryer
This step is missed by many beginners and it makes a real difference.
Switch your air fryer on empty and set it to 190°C (375°F). Let it run for 3 to 5 minutes before adding any food. A preheated air fryer is already at cooking temperature when the fries go in — the exterior of each fry begins crisping immediately. An unpreheated fryer starts cold, and the fries slowly warm up rather than crisping from first contact. The difference in the final crunch is noticeable.
Step 6: Load the basket — the spacing rule
This is the step where most people lose their crispiness. Place the fries into the air fryer basket in a single layer with small spaces between them. Do not pile, stack, or heap them.
Remember the 360° air circulation principle from earlier in this article. For that circulation to crisp every surface of every fry, the air must reach every surface. Fries stacked on top of each other have surfaces pressed together — those surfaces steam against each other rather than crisping. The result is soft patches, uneven browning, and disappointing texture.
If you have more fries than fit in a single layer — and for 3 to 4 potatoes you likely will — cook in two separate batches. Yes, this takes longer. But perfectly crispy fries in two batches are far more satisfying than a single disappointing batch of steamed-inside, inconsistently browned chips.
A light double layer is acceptable — two layers max, with the fries arranged loosely rather than packed tightly. Three layers or more will give you uneven, under-crisped results.
Step 7: Cook — with one important shake
Set the temperature to 190°C (375°F) and cook for 15 minutes. At the halfway point — 7 to 8 minutes in — open the basket and shake it firmly to turn the fries. This ensures every side gets contact with the hot air rather than one side cooking faster than the other.
After the initial 15 minutes, check your fries. If they look golden and feel crisp when you tap them, they are nearly done. At this point, increase the temperature to 200°C (400°F) and cook for a final 3 to 5 minutes. This temperature increase in the last minutes is the trick that takes fries from good to exceptional — it mimics the effect of the double-fry technique used in professional kitchens, producing that final snap of crispiness on the exterior.
Step 8: The final assembly — the warm-up round
If you cooked in multiple batches, the earlier batches will have cooled and softened slightly while you finished the rest. Do not serve cold first-batch fries alongside hot fresh ones.
Once your final batch is done, add all the fries back into the basket together — at this point do not worry about spacing — and run the air fryer at 190°C for 1 to 2 minutes. This quick final pass warms everything up evenly and restores crispiness to any fry that has softened during the wait.
Step 9: Season immediately and serve hot
The moment the fries come out of the basket, hit them with a pinch of salt while they are still hot. Seasoning hot fries means the salt adheres and seasons the surface properly. Salting cold fries means the salt sits on top without penetrating.
Serve immediately. Air fryer fries are at their peak crispiness the moment they come out. Like all fries everywhere, they soften as they cool. Enjoy them hot.
Seasoning Variations — Beyond Classic Salt
Once you are comfortable with the base recipe, these variations take your fries in different and exciting directions. All use the same method — simply swap or add to the seasoning blend in Step 4.
Suya-spiced fries: Season with ground pepper, ginger powder, garlic powder, onion powder, a pinch of ground crayfish, and salt. The result is a fry with warm, complex spice that pairs beautifully with grilled meats or as a standalone snack. This is the variation that feels entirely Nigerian and entirely right.
Garlic Parmesan fries: After cooking, while still hot, toss with a tablespoon of melted butter, finely minced fresh garlic (or garlic powder), chopped parsley, and finely grated Parmesan or hard cheese if available. Rich, aromatic, deeply satisfying.
Smoky paprika fries: Double the smoked paprika in the base seasoning and add a pinch of cayenne pepper for gentle heat. These have a beautiful deep reddish-gold colour and a warm, slightly smoky taste.
Pepper seasoning fries: Nigerian-style — season generously with ground pepper, salt, and onion powder. Serve with a dipping sauce of ketchup mixed with a small amount of pepper sauce.
Simple and classic: Sometimes salt alone — good quality sea salt, sprinkled generously over hot fries the moment they come out — is all you need. The potato flavour speaks for itself when the technique is right.
Dipping Sauces Worth Making
Ketchup and pepper sauce blend: Two tablespoons of tomato ketchup mixed with one teaspoon of your favourite Nigerian pepper sauce. Sweet, tangy, and just enough heat.
Garlic mayo: Three tablespoons of mayonnaise, one small clove of garlic finely grated or crushed, a squeeze of lemon or lime, and a pinch of salt. Smooth, rich, and creamy against the crispy fry.
Spicy tomato dip: Blended fresh tomatoes, a small onion, Scotch bonnet, salt, and a little oil — cooked down for five minutes until slightly thickened. Served warm. This is the dip that makes fries feel like a full Nigerian snack experience.
The Mistakes That Ruin Air Fryer Fries (And How to Avoid Every One)
Not soaking the potatoes: The starch stays on the surface, gums up in the heat, and produces soft rather than crispy fries. Always soak for at least 30 minutes.
Not drying thoroughly after soaking: Moisture becomes steam in the air fryer. Steam makes fries soft. Dry every fry completely before seasoning.
Overcrowding the basket: The single most common reason air fryer fries disappoint. Fries need space. Give it to them. Cook in batches if necessary — it is worth it every single time.
Too much oil: More oil does not mean more crispiness. It means soggier fries. One to two tablespoons coats an entire batch. Trust the amount and resist the urge to add more.
Not preheating: A cold air fryer means gradual warming rather than immediate crisping. Always preheat for 3 to 5 minutes before the food goes in.
Not shaking halfway through: Fries that sit in one position will brown on one side and remain pale on the other. One firm shake at the halfway point takes seconds and makes a visible difference.
Serving them cold: Air fryer fries are best the moment they emerge. Do not delay. Plate them immediately and eat them hot.
The Appliance Behind the Recipe — Available Now at DISPASAL
If you read through this entire guide with no air fryer at home, and you find yourself wanting one — that is entirely the point.
Every result described above — the golden colour, the crunch, the minimal oil, the quick cook time, the cleanup that takes two minutes — comes from a quality air fryer with proper 360° circulation. The technique matters. But the right appliance makes the technique possible.
At DISPASAL, we stock quality air fryers from trusted brands including Hisense, Qasa, and Maxi, across sizes from 5 litres to 6.3 litres and above — suitable for singles, couples, and full family use. Every unit comes with a verified warranty and honest buying advice.
Our team will help you choose the right size for your household so your first batch of chips is everything this article promised.
Visit us in-store: No. 2 Berger Paint Junction, Chaza Road, Opposite Jehova Eze Plaza, Shop 5, Suleja, Niger State
WhatsApp, call, or shop online: 📱 09164425471 📧 info@dispasal.com 🌐 dispasal.com
Quality You Can Trust. Service You Can Count On. — DISPASAL, Suleja, Niger State